DIY Kits: Create unique sun prints with ready-to-use Solar Photo Paper
Thursday, February 9, 2023
Are you looking for simple yet creative DIY items, original gifts or fun activities for kids (or yourself 😉 )? The handy and ready-to-use solar photo paper is suitable for a wide audience, but extra fun for children. With the solar photo paper, you use the power of the sun and capture shadows on paper. Make the most unique creations, using beautiful objects such as flowers or feathers.

What DIY solar photo paper kits consist of
The colourful DIY kits consist of a nice designed envelope containing 12 sheets of A5 photo paper or 6 sheets of A4 photo paper. On the packaging you will find an easy-to-read step-by-step plan, with attractive photos and a QR code linking to a how-to video. So the buyer knows how to get started within 1 minute, which is very helpful.
The nostalgia of analogue photography
The ready-to-use (cyanotype) photo sheets come in a black bag to prevent early photo development. So you don't open these until you actually get started. A bit like the photo rolls in your analogue camera back in the day!

Step-by-step plan
Do you want to inform your customer in advance and get them excited about this super fun DIY product? Watch the step-by-step plan & videos below and use them in your own communication:

Here's how to make beautiful creations with the solar photo paper in 7 steps:
1. Collect cool objects for your artwork, such as flower buds or leaves
2. Remove the photo paper from the black plastic bag (do this in the shade, because once it is outside it can already start to develop). Place the solar photo paper on a flat surface, such as a table or countertop.
3. Place different (flat) objects on the paper. Be creative!
4. Use a sheet of glass to cover your artwork with, for when it is windy.
5. Place the photo paper with the objects (and transparent sheet) in the sunlight for 3 to 10 minutes. Preferably do this during a bright day, so the photo paper can absorb enough sunlight. If the sun is not so strong, leave your creation in the light a little longer.
6. Remove the objects from the paper. You can now clearly see a difference in colour on the paper where your objects have been. Soak the paper in a bowl of water or rinse it under the tap, you will now see the colours reverse.
7. Let the paper dry flat in the shade for best results. PS. In a bit more of a hurry? A hair dryer also works, but may wrinkle the paper slightly.
Moodvideo & How-to video
Moodvideo | How-to video (from packaging) |
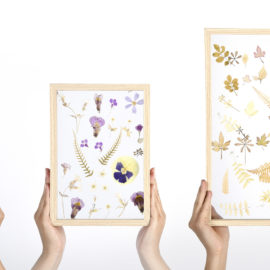
Did you know that you can also hang the end result in a nice photo frame or poster holder? Use the dried solar photo paper with the design as a work of art. Hang it on the wall, for example, or put the wide frame on the dresser, wall shelf or side table.

Would you like to sell solar photo paper in your shop? You can find them in 2 sizes.
PS. You can order the solar photo paper products now already, but we can deliver it to you from March onward.


Solar photo paper A4


Solar photo paper A5
A perfect in-store combination
So photo frames or poster hangers are ideal to combine with the DIY solar photo paper kits. But also consider selling a flower press with the solar photo paper items. Flattened petals will give an extra nice effect in the final result.


